
Friday, 27 April 2012
ADDING THE GRAPHIC CIRCLES TO TEXTURED BODICE...
To make the Frowning top and Invisible pants link I had to interchange features on both garments to make them work together as an overall outfit. So I added the circles from the trousers underneath the original circles on the bodice. Also I changed the fabric to make them link together more efficiently. I think the overall composition looks much stronger and should work more as a whole outfit now I have made these adjustments.


CREATING MY INVISIBLE PANTS...
I have now progressed onto creating my invisible pants which are paired with the "Frowning top" and "Senseless jacket". By making up these trousers I realised the frowning top had been made in a fabric choice that didn't complement the colour scheme of the trousers. To make this work I changed the two centre front panels and centre back panels to the same fabric used for the trousers and will also add additional circles that are seen in the side panels of the trousers onto the front of the bodice. I feel that my trousers have been a huge success and were simple compared to the other garments I still have to construct. I feel more confident with the second attempt at the bodice matched with the trousers rather the first attempt. What are your views on the bodice like the first or second attempt?


Monday, 23 April 2012
STARTING MY FINAL FROWNING TOP...
I have started constructing my frowning top making it using 7 panels. I used two different flat weaves as I preferred it that way whilst toiling. I constructed these 7 panels and inserted the zip so similar to the dress all I need to do is sew on the circles. I am pleased how the panels have turned out and realised that the colours work well together. What do you think?


STARTING MY FINAL COLLECTION...
After completing my toiles I finally have moved onto the task of creating my final collection. I started with one of the easiest designs to get it out of the way - the DESERTING DRESS. I made sure I took my time and over locked every seam. I then placed on the circles to the correct composition and pinned them securely. I still need to sew them to the fabric but should do that when I am sure I want them in that place. I am very pleased with the final outcome so far and am surprised how neat I have been and I have done all the steps in a logical order. All I needed to do was sew the darts, sew side and shoulder seams and insert the invisible zip, now all I have to do is sew the circles on and finish the dress and it will be done. What do you reckon?


Thursday, 19 April 2012
LOOKING AT MY COLLECTION AS WHOLE...
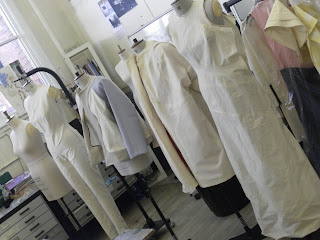
After completing all of my toiles I pieces all the outfits together to see how they looked as a whole. I realised that the coat and jacket and trousers use similar deign lines so complement each other. Also the evening dress and the jumpsuit also complement each other with the use of the diagonal lines. I am really pleased with how they look and hopefully they should look better all in the same colour range and correctly constructed.

FINISHING MY JACKET WITH BIAS BINDING...
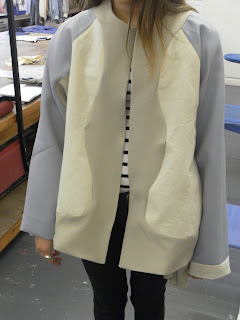
I had already made a lining for my senseless jacket, but the problem was that it didn't fit to the outer shell. So I decided that I would replicate the front panel of the outer shell and use that as a front facing and then finish it with a satin bias binding. To finish the other seams I will over lock them before sewing them together so it's not as fiddly. I feel like this bias binding has worked out really well and hopefully it should work better for the final garment. It won't look as good as a full lined jacket but will look better that what it will turn out.


Tuesday, 17 April 2012
LAST TOILE TO COMPLETE - THE SENSELESS JACKET...
I have finally reached the end of my toile making, which is quite daunting because no more mistakes can be made.


First of all I made the kimono style jacket using all 1cm seam allowance. I then placed it on the mannequin and sketched on the design lines to where my panels would be.
Then I sewed the sleeve seam under the arm to then attach to the raglan seam which allowed me to ease the under arm panels in. I then attached the centre front panel using 1cm seam allowance making sure all the notches were matching. Lastly I attached the centre back panel making sure the middle of the front panels attaching matched the middle of the centre back panel.
I feel like inserting these panels has gone well so far but the hardest part - THE LINING is yet to come so I hope I survive! How does it look?
Subscribe to:
Posts (Atom)