
Saturday, 26 November 2011
TRICKY PART - THE APPLIQUE...
After completing my leggings and the base to my design I then moved onto attempting to sew on the appliqued shapes in the neatest way possible. The first attempt with just pinning it to the leggings didn't work as it bubbled up giving it an unprofessional effect. Then I tack stitched the shapes on prior to sewing and then sewed over them and they sewed on neater and flatter giving a crisper finish. Now I feel confident with this design working but still need to make sure the PVC will work and sew on properly so will have to sample that before starting my final attempt.
CREATING CUFFS FOR MY LEGGINGS...
The same way I created the waist band I also created some cuffs to finish off the bottom trouser which in this case turned out quite nicely and were simple to construct. The only problem I could have would be that the leggings are extra long so if they don't fit the model I would have to turn up the leggings and re fit the cuffs to fit the new length. Like them?

CREATING A WAIST BAND FOR MY LEGGINGS...
In yesterday's pattern cutting lesson I managed to finish my leggings with a waistband and cuffs. This was a simple process as I had to fold over the pattern and pin to waist or lower leg and over lock to fabric. I found this quite easy to follow but I need to improve my technique whilst matching notches because I found that the stretch fabric moved and the notches didn't match up. I felt that the waistband work very well and fitted exactly so I was pleased with this method.

Wednesday, 23 November 2011
CREATING A DESIGN WITH MY OWN TEMPLATE...
For today's task we have had to create a template by merging poses and facial expressions we like together and trace off to create a full figure. I had to two attempt and chose the best outcome to then sketch over it my design from the last brief. I then added colour and focused in on features and areas that might need sampling and how it will function. At the start of this task I was getting a bit frustrated as I couldn't draw it free hand but then the computer made it much easier to cope with. I then started to enjoy the experimenting and knowing that I have created the template myself.


Saturday, 19 November 2011
2 DESIGN SHEETS COMPLETE JUST 4 MORE TO GO...
I have already posted one of my design sheets up but now it's complete so you can see how more I have added to it. The first design sheet is based on a trousers and top outfit that uses inserts so I had to focus on stitches, zips, inserts, waist bands, button holes. Then I did another one which was a cape, top and skirt and had to deconstruct the features to see how I would sample and make it and what fabrics I would use. I am pleased with these now so they can go in my portfolio for interview for universities.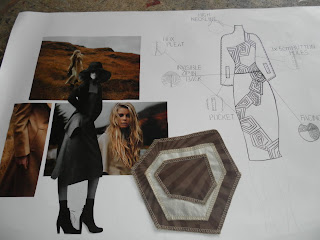

What do you guys think?


What do you guys think?
STARTING MY TOILE...
In the end I went with a flesh coloured Lycra from www.fabricland.co.uk
which was £5-99 a metre so was ideal to use for a Toile and the final leggings. I first started off by testing all the over lockers that were available to me to see which was the easiest to work with Lycra and the winner was in the Foundation Degree room. I then started by sewing the seams on the inner leg 1cm seam allowance up to the crotch area making sure all notches matched.Then I went onto sewing the crotch areas together matching them at the central notches with a 1cm seam allowance. Then I took it over to the mannequin and measured the waist to the stands size and realised it was about 2.5cm to big on both front and back so pinned it and took it in about 2cm from the front and back so it fitted. It still could do with a little bit more taken off but for now it's not such a big deal. That's all I managed to achieve from yesterday's lesson but I was working with stretch fabric so it took longer than expected.


which was £5-99 a metre so was ideal to use for a Toile and the final leggings. I first started off by testing all the over lockers that were available to me to see which was the easiest to work with Lycra and the winner was in the Foundation Degree room. I then started by sewing the seams on the inner leg 1cm seam allowance up to the crotch area making sure all notches matched.Then I went onto sewing the crotch areas together matching them at the central notches with a 1cm seam allowance. Then I took it over to the mannequin and measured the waist to the stands size and realised it was about 2.5cm to big on both front and back so pinned it and took it in about 2cm from the front and back so it fitted. It still could do with a little bit more taken off but for now it's not such a big deal. That's all I managed to achieve from yesterday's lesson but I was working with stretch fabric so it took longer than expected.


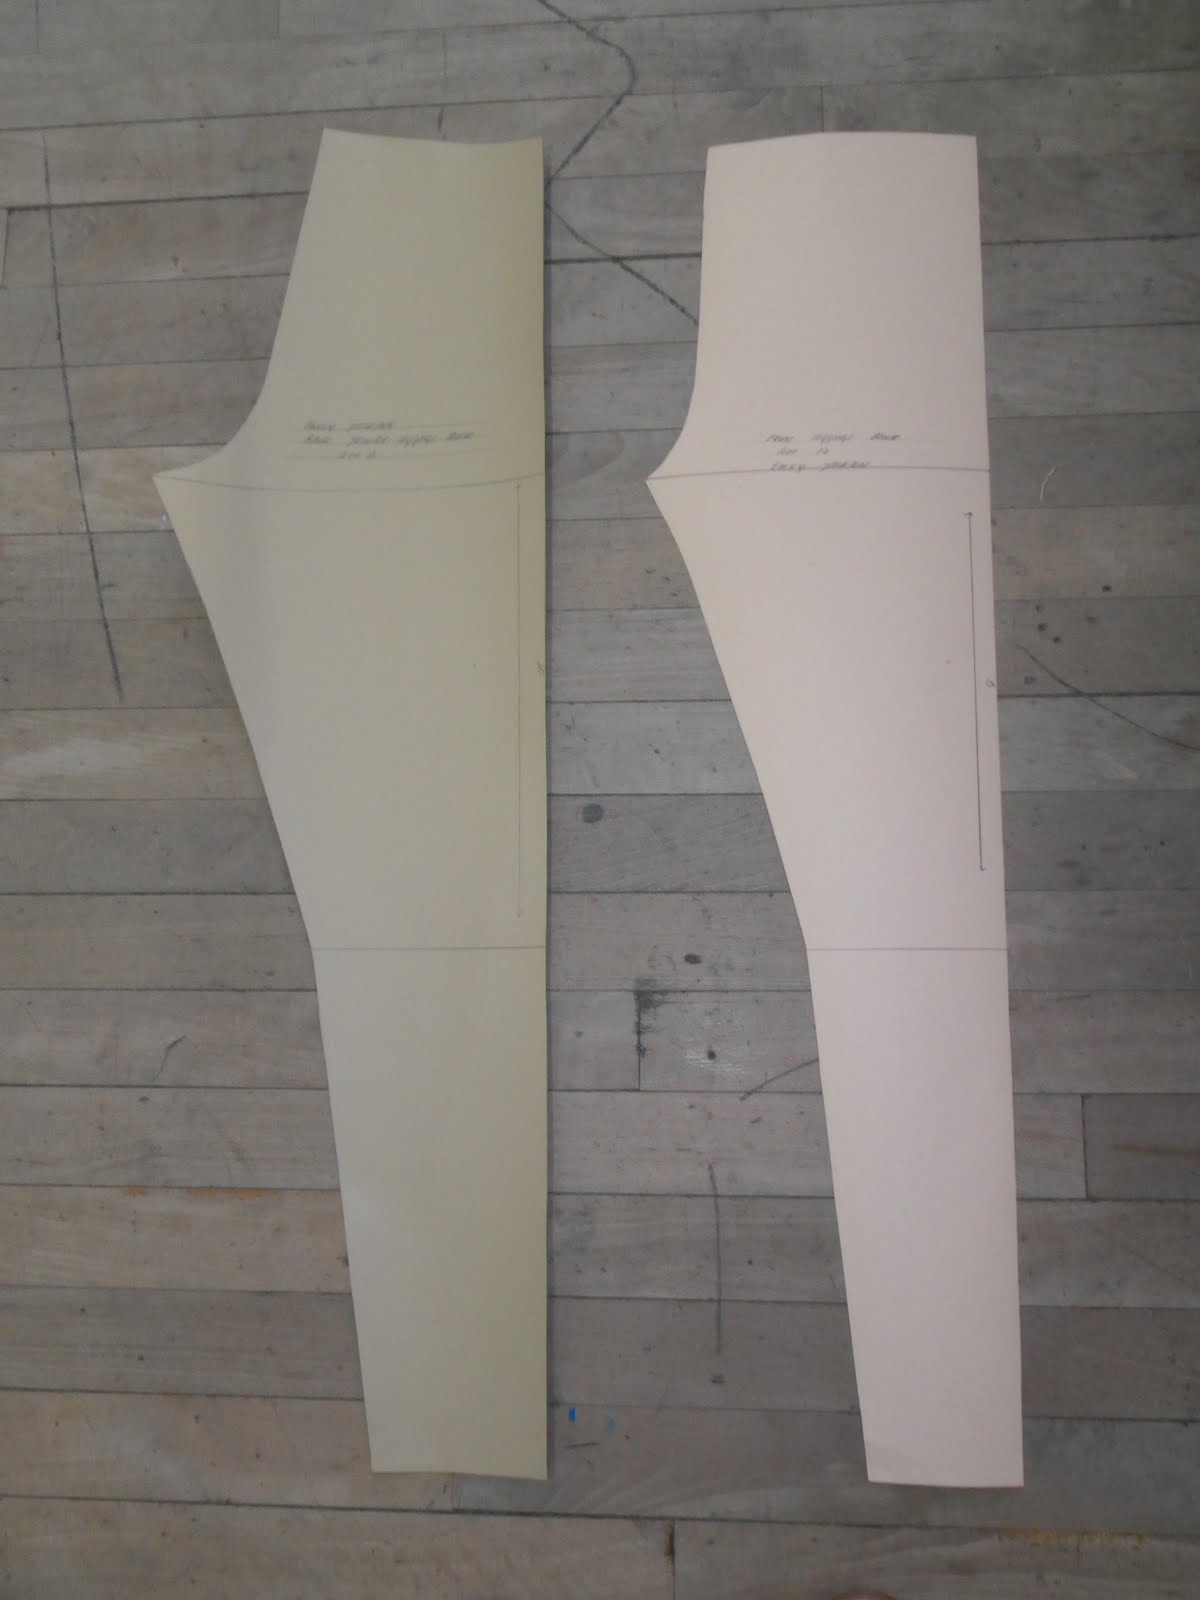
CREATING MY BLOCKS AND PATTERNS FOR LEGGINGS...
For the last week I have been creating my leggings block for my manufacturing brief as I didn't want to use a trouser pattern. I found this process quite simple following instructions from a Winnie Aldrich book. After I had created that I could move onto patterning and simply traced around the blocks attached the front and back together removing the side seam and drawing 1cm seam allowance and that was my pattern done. I had to use 1cm seam allowance as I am working with stretch fabric so over locking the seams together. If you ever struggle to find a good pattern cutting book I recommend Winnie Aldrich it's simple to follow and has everything in it.


Subscribe to:
Posts (Atom)