I have already posted one of my design sheets up but now it's complete so you can see how more I have added to it. The first design sheet is based on a trousers and top outfit that uses inserts so I had to focus on stitches, zips, inserts, waist bands, button holes. Then I did another one which was a cape, top and skirt and had to deconstruct the features to see how I would sample and make it and what fabrics I would use. I am pleased with these now so they can go in my portfolio for interview for universities.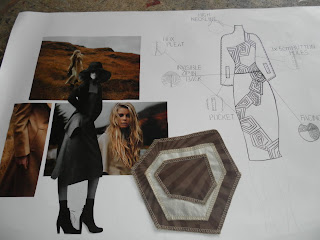

What do you guys think?
After collecting my own personal collection of Lycra samples I thought it would be a good idea to start sample the PVC onto the Lycra to see which was the least challenging to work with. I found that the thicker Lycra was easiest to work with whereas the mesh was a little bit to hard to handle under the machine and folded over and turned up. I thought the non mesh types were the best and would definitely be using one of the plainer Lycras to create my leggings block.

Which one is your favourite?
Last week I started to sample different PVC types with different sewing techniques to see which one would work the best. I thought that my fabric choice could be interesting with the use of PVC on Lycra so I machined stitched and hand sewed different widths of PVC together to see which I would like to use for the final garment. I felt that the medium weights of PVC worked the best as they defined shape whilst still being manageable with sewing. Also the organic silk gave an interesting texture contrasting to the shiny surface of the PVC, so i might consider using this for my final design. I also had an idea to sew teeth of zips into the seams and felt that this sample worked out quite nice and would look better in a larger scale.

Which do you prefer?
As we were looking at variations of pocket designs were created a self faced patch pocket which was sewn in a completely different way. I preferred this method because it made more sense and was methodical in the way you sewed it together. The way in which I did this was by:
1. Sew 1.5cm seam allowance from opening either side and press the seam open.
2. Fold curved edge of the lining to meet notches on the shell and sew 1.5cm seam allowance around the curve.
3. Bag it all out and press it neatly.
4. Secure the opening gap with a very close stitch to the edge.
5. Sew from the top on one side to meet the other side with roughly 0.5cm and double the stitching by sewing another curved lined inside by another 0.5cm allowance.
A good way of guiding me was using the pronged feet on the sewing machine so if you struggle use them and it will turned out successfully.


