TUESDAY.. The day started with my gathering strip wanting to work against me as I used Calico and the thread kept on snapping.So.. I fell behind and ended up finally creating a gathered strip.
The next problem was then my hoody. But it wasn't just the hoody the machine decided it didn't want to work and I had to un pick button holes which if you know they are an absolute nightmare.
Finally I unpicked them all and my hoody has recovered but what a stressful time it was!
Just to top off the day though the vending machine ate my money and didn't want to give me a drink so I complained and left a note for the dinner lady and guess what on the way out checked if it would give me my money back and a Diet coca Cola bottle popped out. JUST MY LUCK!
I was running late for the bus and I bet you think that I missed my bus but fortunately I got on and didn't get left behind.
Thursday, 17 February 2011
HOW TO PUT GATHERS IN A SHOULDER SEAM


The process to put gathers in a shoulder seam is very similar to gathering a sleeve head but I found it more time consuming because you had to make sure the measurements were precise and accurate.
MANUFACTURE PLAN FOR PUTTING GATHERS IN A SHOULDER SEAM.
1.Cut out pattern in fabric.
2. Over lock around all of the bodice
3. Draw a 1.5cm seam line with tailor's chalk from notch A to notch B.
4. Change the stitch length to 4 without back tacking and sew either side of the 1.5 cm seam line.
5. Pull both of the loose threads to create gathers in the bodice so that the shoulder seam measures 15.5 cm. (This includes the seam allowances and the finished length of the shoulder.)
6. Change the stitch length back to 3 and secure the gathers by sewing along the 1.5cm seam line making sure I back tack.
Wednesday, 16 February 2011
HOW TO GATHER A SLEEVE HEAD


Last week we created a gathered sleeve head. I thought about it and I realised I'm not the best at gathering.
What am I going to do?
Luckily I managed to get through it and produce a good sample.
I thought I would write down the manufacture plan if any of you out there want to attempt this technique. Don't worry its not as bad you think.
MANUFACTURE PLAN FOR A GATHERED SLEEVE HEAD.
1. Cut pattern out in fabric.
2. Over lock all around the sleeve.
3. Draw 1.5cm seam line with tailor's chalk from the start to the end of the gathering notches.
4. Change the stitch length to 4 and without back tacking sew either side of the 15.cm seam line.
5. Pull both of the loose threads to create gathers on the sleeve head making sure it measures the length of my original sleeve head.
6. Secure the gathers by sewing along the 1.5cm seam line making sure I back tack.
Sunday, 6 February 2011
FINAL ACCESSORY


My final outcome came out better than I thought as the additional reverse applique filled in the negative space and made both sides of the accessory symmetrical. I managed to keep everything aligned and neat and all the problems I had which wasn't very many were solved in time for the deadline date. I managed to incorporate 3 workshop techniques into my final design and two of my own which were inspired by the research I did on Alison Willoughby. In think that all the shapes work well together to provide volume to the shoulder and add layers to the lining of the fabric.If I were to improve on this final design I could have made the bottom of the accessory neater or piped or added gathering at the bottom to give it some detail and draw some attention to it.
CREATING AND ATTACHING THE RUFFLED CONES


First of all I traced off the inner circle of my masking tape and cut out loads of them and folded them into quarters and stitched down one side to secure the opening.I repeated this process and stitched them in three's and four's in white and cream calico all along the curve of the cone. I created the larger cones by cutting them from the neckline whilst cutting out my pattern for the final accessory. Then I stitched along the curved to secure all the individual ruffles.Furthermore, I decided that one of my other techniques was going to be beading so I hand stitched along the edge of the right angle of the cone in alternate colours of cream and white the colours featured on the ruffles keeping the colour scheme consistent.In my opinion I think I have been able to create a nice finish to the cone and highlighted the feature to make it stand out.
INSERTING THE APPLIQUE

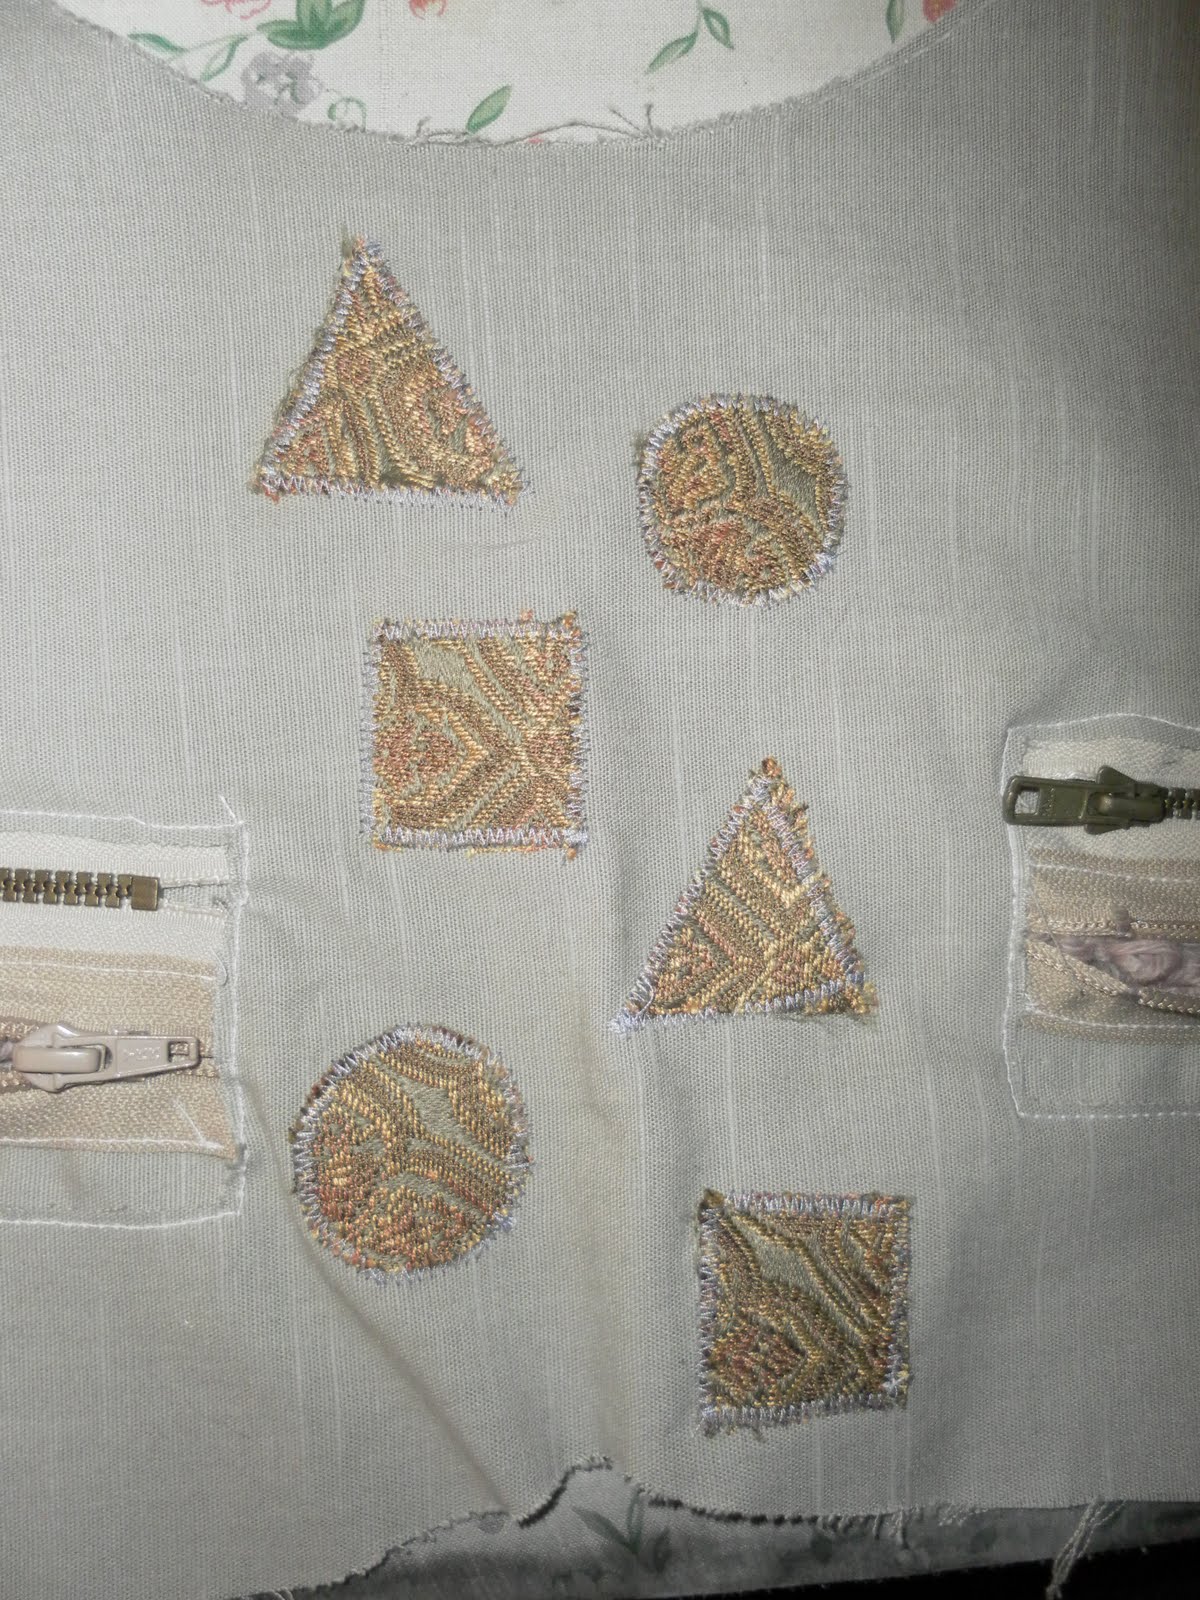
The first stage was to iron on the bondaweb to the fabric and traced off my shapes inspired by Fred Butler's work and then cut out the shapes and peel of the paper to then iron on to the accessory. I positioned the applique in the centre of the accessory so it creates attention to the reverse applique either side. Then I set my machine to a zig zag stitch at the right length and threaded it with a colour that would be subtle and stitched along the edge of the shape. The colour used was light and blended in to the shapes so if I were to improve I could have used a more contrasting colour to make the shapes shapes stand out more. I chose a patterned fabric so it would contrast to the basic lining complementing the colour scheme within the pattern.
INSERTING THE REVERSE APPLIQUE


The first stage of inserting the reverse applique was sewing the zips by overlapping them and stitching down the tape onto a piece of separate fabric the same as the lining then I opened the bottom zip and inserted knitted wool suited to my colour scheme and stitched it down one side so it was securely in place. Then I positioned the reverse applique in a suitable space on the front bodice trying to keep them even on both sides.The next thing was to top stitch around the rectangle and rip the space inside to reveal the zips underneath. To make it reverse applique I would have to zig zag stitch around the running stitch but I like how it looks without so I've decided to leave it how it is in the image. I had a problem whilst attaching them to the final accessory as I didn't stitch them at the same level but diagonally parallel which I preferred in the end.
Subscribe to:
Posts (Atom)